
Preheat-coils for the Gaggia Classic model group (Version 1 Classic, Classic Pro, Classic Evo most Babies, Selecta Deluxe, Colour, Evolution, Paros, Tebe, KitchenAid).
The route cause for developing this product:
The tiny 80ml (ml=g) boiler weights about 1/2 kilo. First we have to understand what happens when we hit the brew button. I am sure most of you know it , but just to ensure we are all on the same page. The pump pushes room temperature water – from the reservoir – to the boiler which is ideally warmed up to about 100°C/212F, to displace hot water from the boiler through the 3-way valve to the grouphead in the hope of 93°C/199F output water temperature. This usually results a temperature drop of 4.0°C/7.0F measured above the puck during a double espresso. This is superior to the original bimetallic thermostat controlled stock version, yet it is far away from prosumer or commercial machines.
There is another way to overcome this issue called intrashot temperature surfing, but that isn’t a convenient and super consistent solution, meanwhile it requires a lot of practicing.
Why should you consider upgrading to preheat coils?
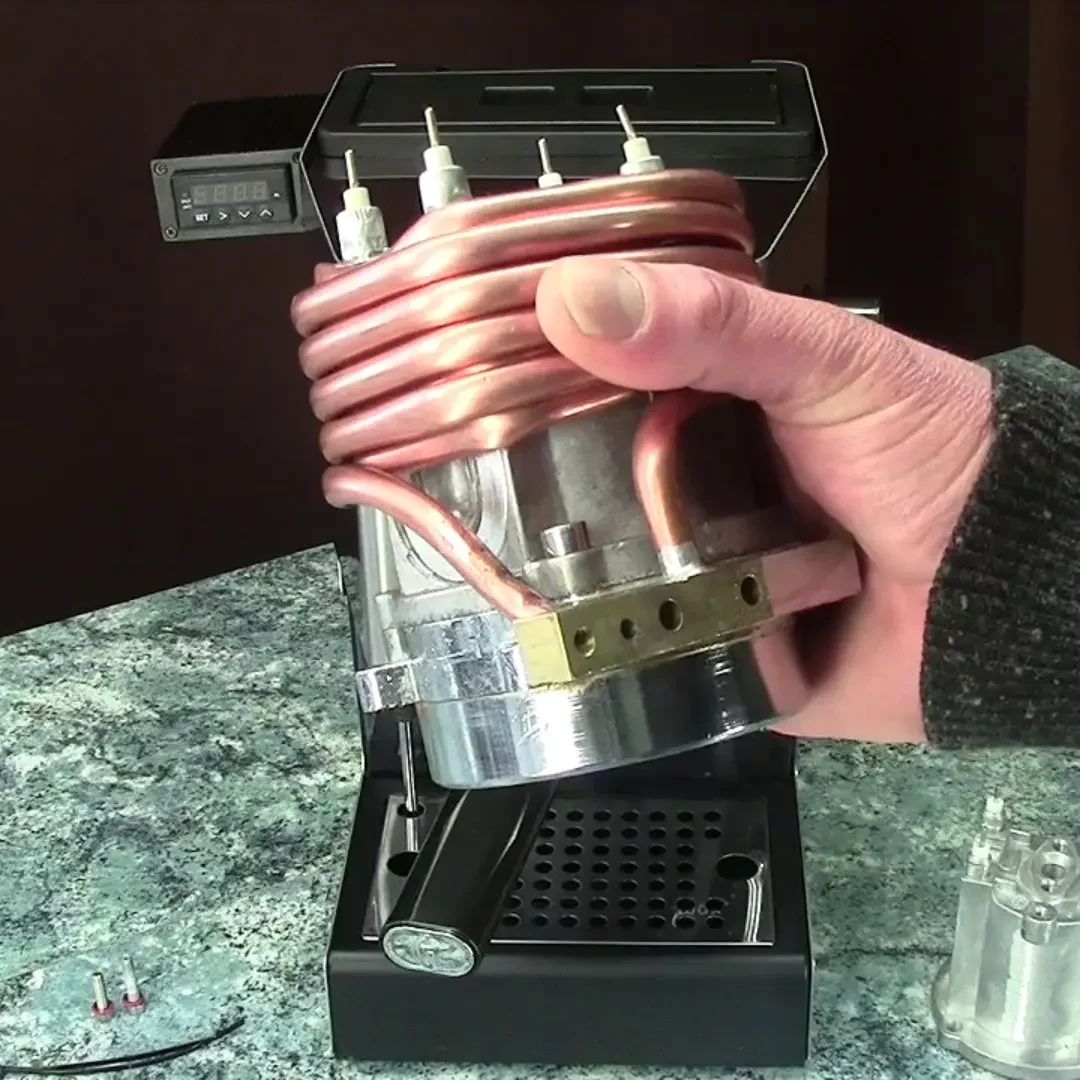
What it does, it wraps around the boiler utilising the heat loss (while also drawning some extra heat of it to be trueful, but that’s negligible in my experience). This has 2 major impacts to the thermodynamics of the machine. First we increased the thermal mass by 1/3 of the entire system or doubled the thermal mass of the boiler itself with a passive extension and it also keeps the first 75ml/2,5oz (93% boiler capacity and equal to the maximum water to be withdrawn during a shot) awaiting to be fed into the boiler pre-heated to ~85C or 185F after a 15-20 minutes of warm-up time . It is easy to see, the less the PID have to fight with, the less it will miss. In real life the usual 4.0°C/7.0F temperature drop measured aabove the puck during a double espresso is reduced to 1.0°C/2.0F if the machine is warmed up properly. And this is done consistently. On V1 Classic it has the intake after the OPV, so only the water used in brewing will be preheated, not to waste energy, or lower the efficiency by heating the overpressure flow, returning to the reservoir. As the coils wrapped around the boiler tightly, the warm-up time is close to the stock version. As a conclusion: For single ristretto drinkers I wouldn’t recommend it too much – worth to mention I did notice difference in taste even with a good intrashot temp surfing routine on my beloved 9g in 12.5g out single ristrettos when achieving +/-0.5C temperature stability measured at the boiler during a shot. On doubles however it has a more significant impact.
CONS:
With the Preheat-coils installed, any shot pulled before the system (brewgroup and preheat-coils) reaches equilibrium (15-20 minutes), will be completely ruined as the coils sucking out a lot of heat from the boiler, so – even if the PID shows target temperature – the output water will be 3-5°C/5-9F lower than expected. You won’t be able to pull a descending pressure profiled shot anymore without uninstalling the preheat-coils. Back to back shots would only be good if you wait 15 minutes between them. Cooling down after steaming would also take longer (this could be speeded up by purging 150ml/5oz water through the group, after that the 15 minutes warm-up would be required again to be ready for a perfect shot.
System requirements:
– The Classic must be PID controlled (both brew and steam mode) because the steam thermowell need to be partially removed, so there will be no room to fit a steam thermostat.
– Small solenoid coils (H:30mm, D22mm, W:28mm) rather than the bigger one, or pressure gauge tapped in between the solenoid and the grouphead (from Brew-Better or Shades of Coffee). This is necessary to position the solenoid coils further away from the boiler. I can also provide with a spacer to overcome this requirement without fitting such a pressure gauge or the small solenoid coils.
– Installation will void the warranty, due to boiler fabrication – ability to fabricate or willingness to order the preheat coils with a new boiler.
What sort of fabrications required for the installation.
The tightly coiled copper tubing fits the boiler snuggly so the stickout of the perimeter should be eliminated at 4 points:
– steam thermostat thermowell (@12 o’clock)
– partial cutting of the tab where the metal plate securing the thermal fuse is bolted (@9 o’clock)(leaving the threading functional)
– complete cutoff of the tab opposite (@3 o’clock)
– smoothening the seam edge
Reviews
There are no reviews yet.